For those who want to stream using a 2D character avatar, being a PNGTuber or GIFTuber is a good alternative to express yourself on your streams.
This works by having a set of images of the character in different versions that can switch around depending on what the streamer does. The most common example is having a character image to open or close their mouth depending if the streamer is talking or not.
It’s a good alternative for streamers who do not want to use a camera, and a lighter option to run compared to Live2D models. Having a GIFtuber can add some additional animation like blinking and additional mouth shapes when talking, and there are tools that can help adding some animation to your image, such as a bouncing animation to make it look less static if you prefer to.
I open commissions for drawing PNGTuber and animated GIFtuber, which have faster turnaround than creating a Live2D model which needs each layer to be separated clean to be animated by the rigger.
Sometimes I get questions about how to use them, so I wanted to make a quick overview from my experience in this post. Hope it can be helpful!

In this post I’ll be talking how to use 2 tools to use your PNGTuber/GIFtuber images that are easy to set up – Reactive Fugitech & Veadotube Mini!
Reactive Fugitech
Reactive Fugitech requires connection to your Discord account, and works when you’re having a call on Discord. It’s very useful when you do collabs with others on call to show your friends on stream!
The handy thing is that you can upload your images once there, and your friends can immediately start using your reactive image on their streams without having you to send them individually or for them to set up one by one.
The general steps are:
- Go to Reactive Fugitech site, Login with your Discord account.
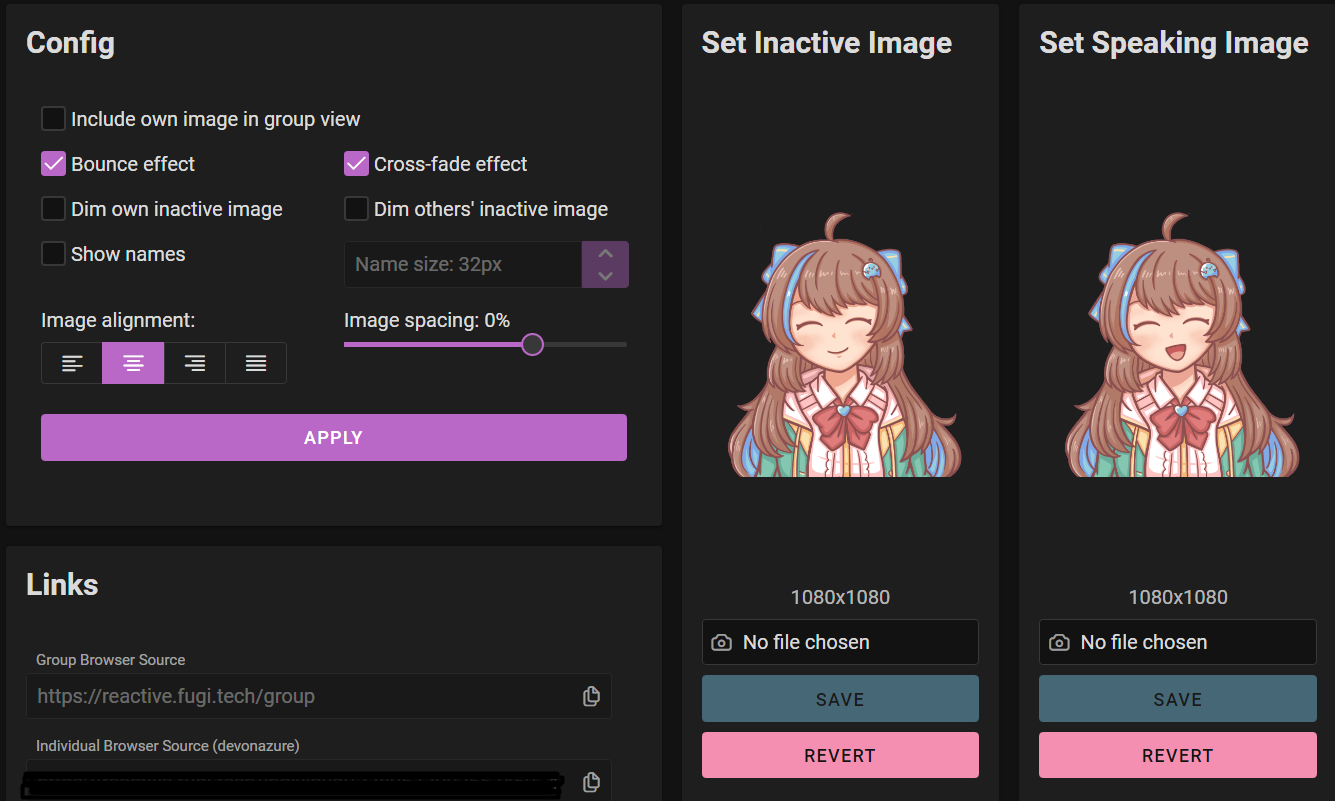
- Upload your images to set the inactive and speaking image.
- Copy the link on the bottom left of the screen according to your needs. ‘Group’ browser source will show everyone in the call (but you can exclude yourself), while other links will show individual person active on the call.
- Add a new Browser source in your OBS, then paste in the link in the URL section.
- Adjust the effect and spacing settings, or move around and resize the character as necessary.

Any image changes made by your friends can be updated on your link directly and the change will be reflected on stream soon after (so be careful if your friend changes the images on stream).
You can also set custom images for your friends’ reactive images. In the page you can also set custom settings such as bounce or fade effect, image spacing, to hide or show the names, and so on.
The changes will apply directly and you do not need to change the links, even when you do another call even in any server, making it convenient to use for collab streams.
Veadotube Mini
If you mostly stream alone and want to switch between different sets of reactive images, or if you want additional animation options, I recommend using Veadotube Mini. It doesn’t require you to connect to Discord, so this does not support multi-user like Reactive Fugitech.
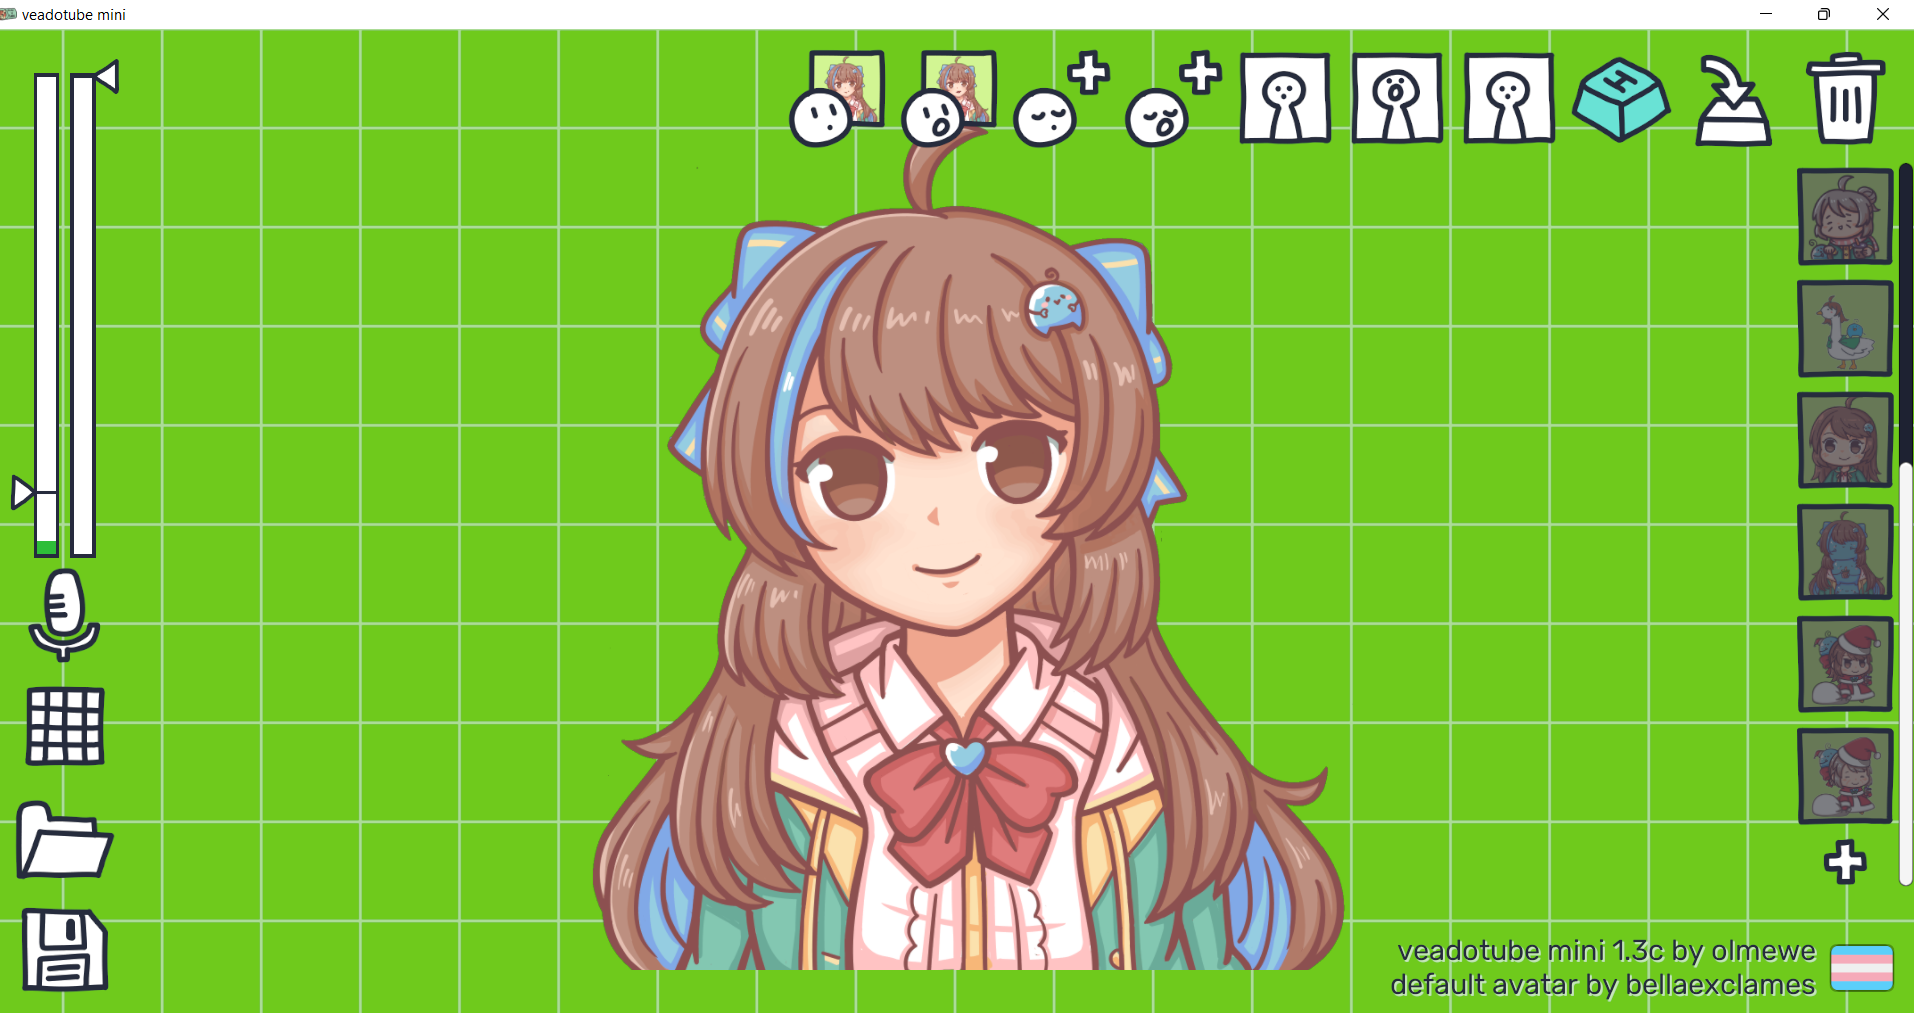
Just install and run the program, add the images, and add it to your OBS as a new source. The green background can simply be removed with adding Chroma key filter in OBS (Right click the source, filters, then select Chroma Key and select the background color to remove).

Multiple reactive images set + keyboard shortcuts
On the right side, you can add multiple set of reactive images, which I enjoy using. I can make multiple variations of my character, such as chibi, non-chibi, or costume alternate versions like a duck costume or Padoru version for Christmas. I can also set keyboard toggles for them by pressing the ‘H’ keyboard button icon on the top row.
In my case, I have different sets of PNGTuber/GIFtuber that my viewers can redeem using Twitch channel point: For example, for 2000 points I’ll become a ‘granny’ avatar on stream, which I can easily switch back and forth between other versions.
Additional Reactive Images Slot
Additionally, you can set additional two more reactive images: blink image for open/close mouth. This is helpful if you’re not using a GIFtuber, but you want to have the blinking effect.
Animation Movements
Additional feature that I enjoy is the animation you can give to your avatar in its speaking or non-speaking state. You can set how ‘shaky’ or ‘bouncy’ your character is, giving more life to your static PNGtuber. For example, I can make my granny avatar to be shaking as she talks or stands still. I find it fun to use!

Lastly, you can also export the settings as a separate file format for use in other locations or if you want to switch between different setting files.
Both Reactive Fugitech and Veadotube Mini are very useful and convenient tools to use, with each having their own strengths for different use cases. There are also other additional alternatives, but these two are the ones I’m familiar with the most.
I’d recommend Fugitech for collaboration streams and if you use Discord a lot.
I’d recommend Veadotube Mini if you want more animations, switching around images set, or if you prefer not to use Discord such as when you stream alone.
Both tools provide support through their own Discord server and where you can get info on latest updates. They are both free tools, but you can show them your support by donating! I’m really grateful for these useful, accessible tools that I can easily use.
Feel free to share your thoughts and experiences with using your PNGTuber/ GIFtuber on stream, or if there are parts you’d like me to add more to the post! I hope this can be a helpful starting point to get to know how to use them!


