For those who want to stream using a 2D character avatar, being a PNGTuber or GIFTuber is a good alternative to express yourself on your streams.
This works by having a set of images of the character in different versions that can switch around depending on what the streamer does. The most common example is having a character image to open or close their mouth depending if the streamer is talking or not.
It’s a good alternative for streamers who do not want to use a webcam, and a lighter option to run compared to Live2D models. Having a GIFtuber can add some additional animation like blinking and additional mouth shapes when talking, and there are tools that can help adding some animation to your image, such as a bouncing animation to make it look less static if you prefer to.
I open commissions for drawing PNGTuber and animated GIFtuber, which have faster turnaround than creating a Live2D model which needs each layer to be separated clean to be animated by the rigger. Sometimes I get questions about how to use them, so I wanted to make a quick overview from my experience in this post. Hope it can be helpful!

In this post I’ll be talking how to use 2 tools to use your PNGTuber / GIFtuber images that are easy to use – Reactive Fugitech & Veadotube Mini!
Reactive Fugitech requires connection to your Discord account, and works when you’re having a call on Discord. It’s very useful when you do collabs with others on call to show your friends on stream! You can also use it for yourself, such as by using your own private voice channel in your server.
The handy thing is that you can upload your reactive avatar images once there, and your friends can immediately start using your reactive image on their streams without having you to send them individually or for them to set up one by one.
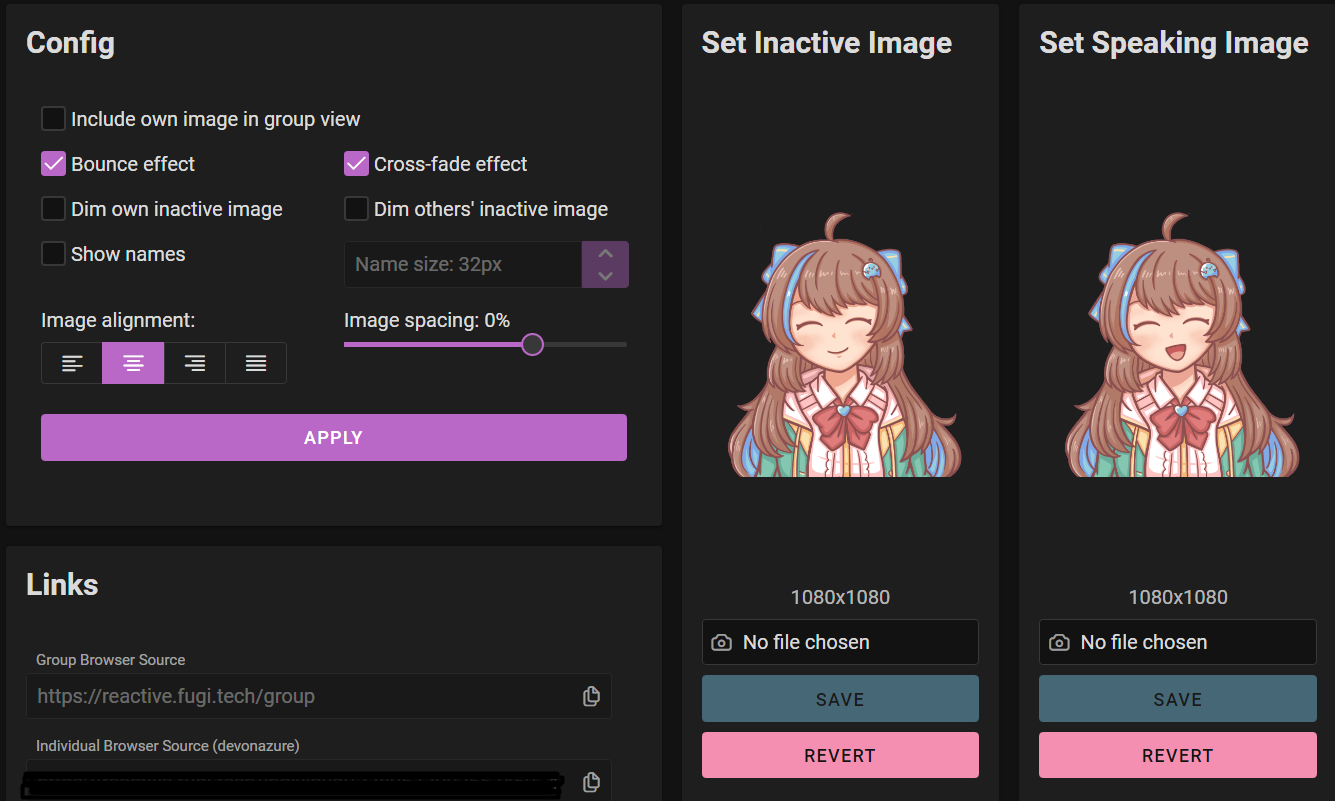
The general steps are:
- Go to Reactive Fugitech site, Login with your Discord account.
- Upload your images to set the inactive and speaking image.
- Copy the source link according to your needs. ‘Group’ browser source will show everyone in the call (but you can exclude yourself), while other links will show individual person active on the call so you can position them wherever you like on your screen.
- Add a new Browser source in OBS, then paste in the link in the URL section.
- Adjust the effect and spacing settings, or move around and resize the character as necessary on your stream screen.
 (Website look as time of writing on Jan 2023)
UPDATE March 2026: the website looks different now but the logic stays the same.
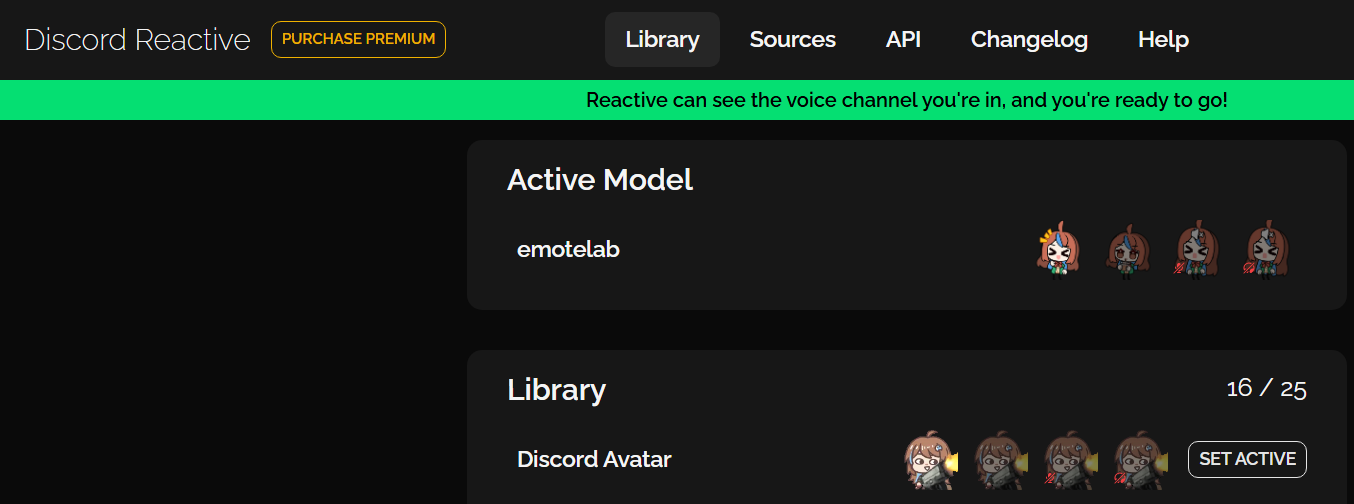
Library tab: now you can save multiple models of combinations for the reactive images, useful if you have multiple versions of images for yourself or others. You can now set specific reactive image when muted and deafened.
Sources tab: You can copy the source links here to put in your streaming software. Copy link of individuals or find the Group by clicking the small icon next to the names.
This is also where you can change settings like adding bounce and crossfade effect, dimming image when not speaking, and hiding mute/deaf icons.
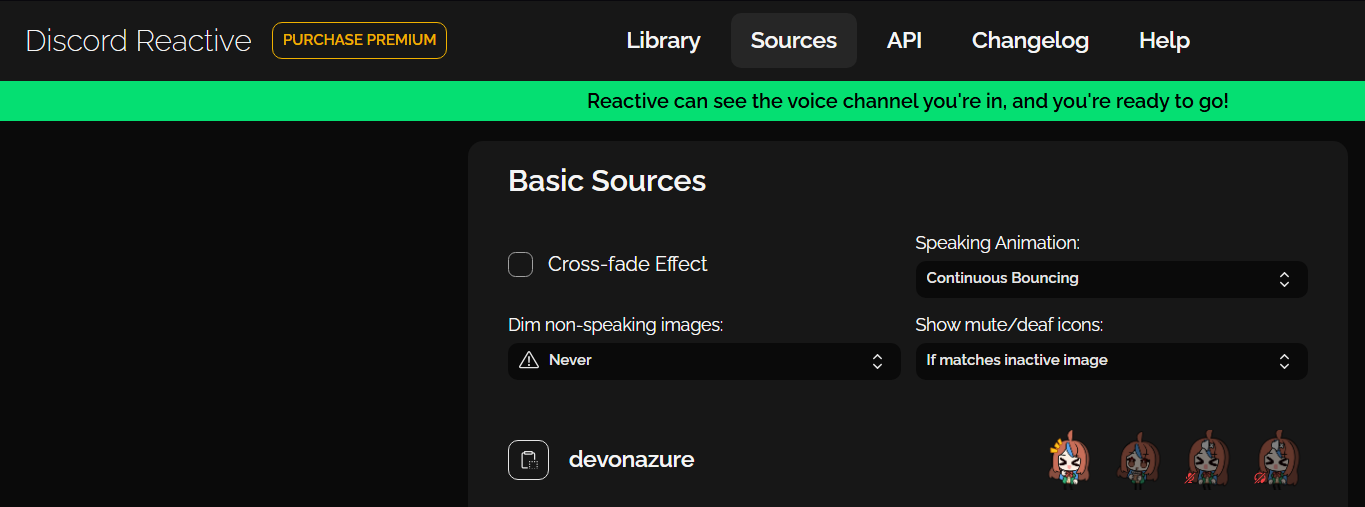
Any image changes made by your friends can be updated on your link directly and the change will be reflected on stream soon after (so be aware that if your friend changes the images on stream, it will automatically be updated on your side).
Alternatively, you can also set specific custom images for your friends’ reactive images. You can also set custom settings such as bounce or fade effect, image spacing, to hide or show the names, and so on.
The changes will apply directly and you do not need to change the links, even when you do another call even in any server, making it convenient to use for collab streams.
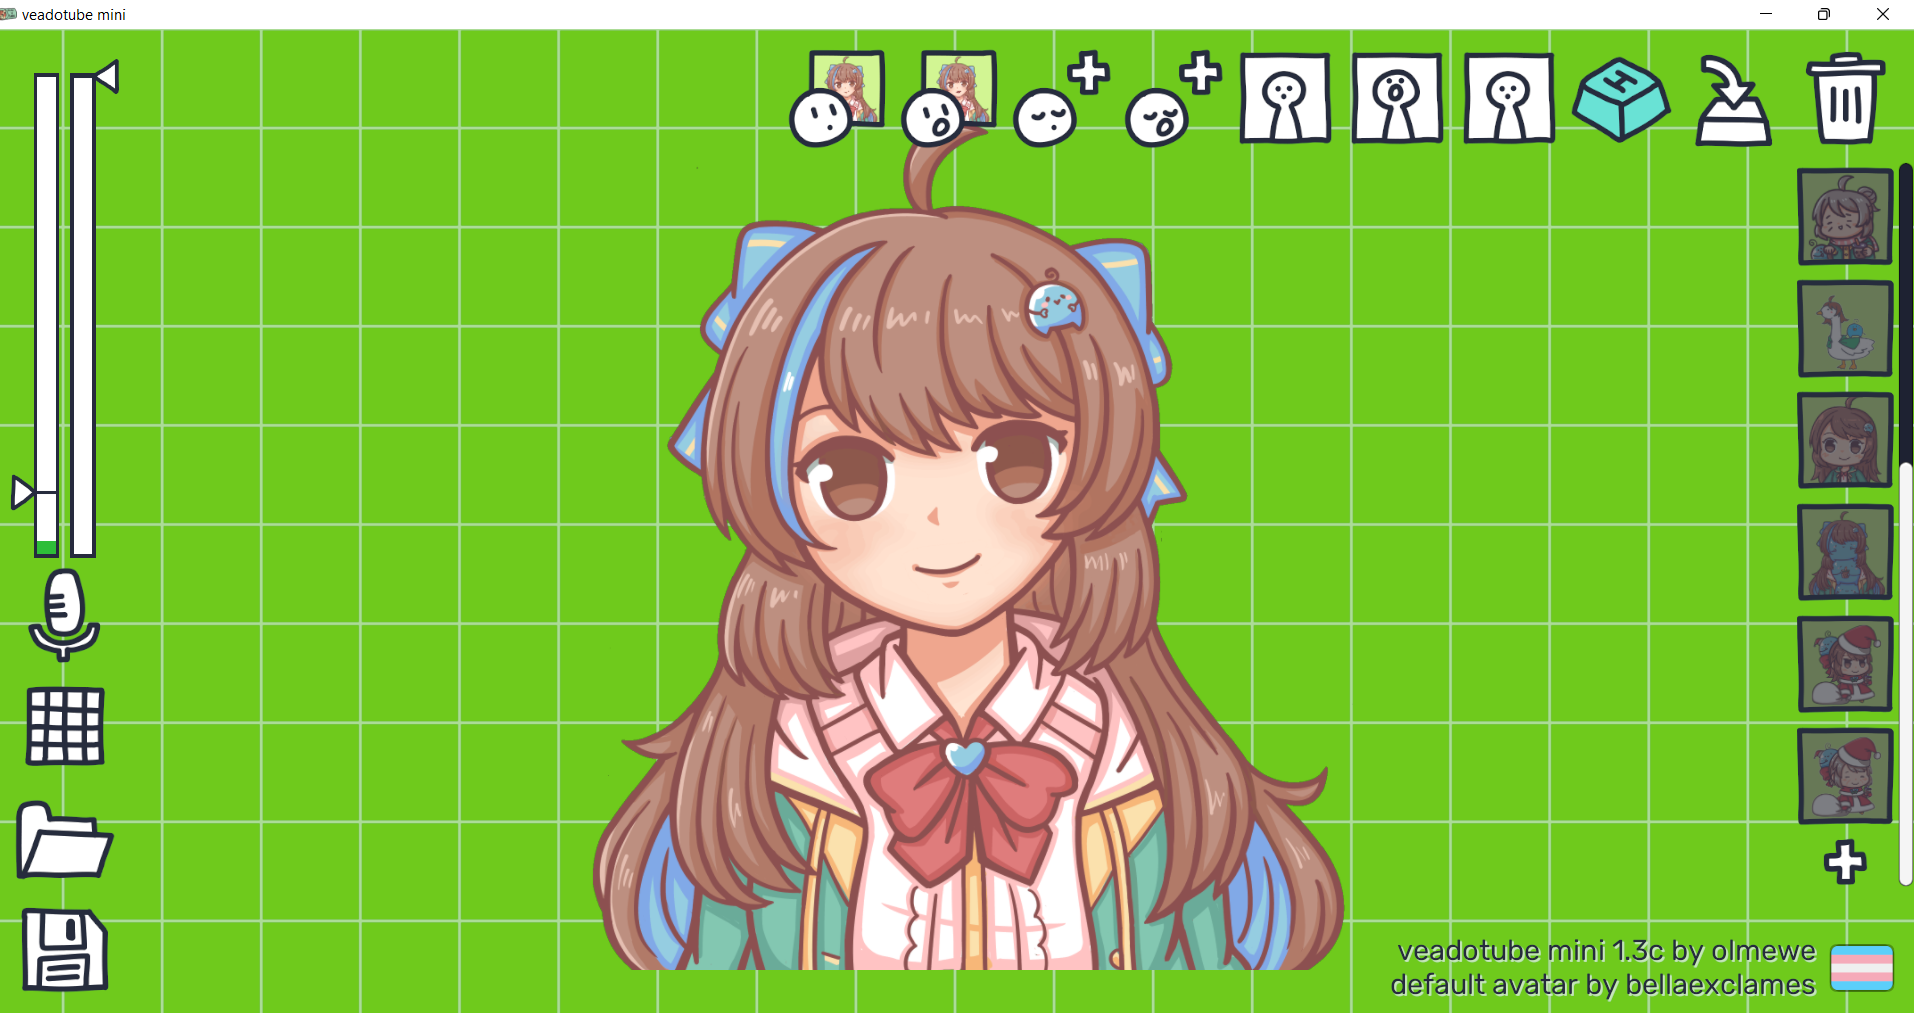 Multiple reactive images set + keyboard shortcuts
On the right side, you can add multiple set of reactive images, which I enjoy using. I can make multiple variations of my character, such as chibi, non-chibi, or costume alternate versions like a duck costume or Padoru version for Christmas.
I can also set keyboard toggles for specific reactive images to switch quickly on stream depending on which reactive image I want to show.
In my case, I have different sets of PNGTuber/GIFtuber that my viewers can redeem using Twitch channel point: For example, for 2000 points I’ll become a ‘granny’ avatar on stream, which I can easily switch back and forth between other versions this way.
Additional Reactive Images Slot
Additionally, you can set additional two more reactive images: blink image for open/close mouth. This is helpful if you’re not using a GIFtuber, but you want to have the blinking effect.
Animation Movements
Additional feature that I enjoy is the animation you can give to your avatar in its speaking or non-speaking state. You can set how ‘shaky’ or ‘bouncy’ your character is, giving more life to your static PNGtuber. For example, I can make my granny avatar to be shaking as she talks or stands still. I find it fun to use!
Multiple reactive images set + keyboard shortcuts
On the right side, you can add multiple set of reactive images, which I enjoy using. I can make multiple variations of my character, such as chibi, non-chibi, or costume alternate versions like a duck costume or Padoru version for Christmas.
I can also set keyboard toggles for specific reactive images to switch quickly on stream depending on which reactive image I want to show.
In my case, I have different sets of PNGTuber/GIFtuber that my viewers can redeem using Twitch channel point: For example, for 2000 points I’ll become a ‘granny’ avatar on stream, which I can easily switch back and forth between other versions this way.
Additional Reactive Images Slot
Additionally, you can set additional two more reactive images: blink image for open/close mouth. This is helpful if you’re not using a GIFtuber, but you want to have the blinking effect.
Animation Movements
Additional feature that I enjoy is the animation you can give to your avatar in its speaking or non-speaking state. You can set how ‘shaky’ or ‘bouncy’ your character is, giving more life to your static PNGtuber. For example, I can make my granny avatar to be shaking as she talks or stands still. I find it fun to use!

Lastly, you can also export the settings as a separate file format for use in other locations or if you want to switch between different setting files.

